 Brainerce Help
Brands
Assign the manufacturer or label to each product, which powers brand filters on the storefront and per-brand reporting in analytics.
A brand is the manufacturer or label on the product: Anker, Apple, Nike, or your own house label. Assigning brands lets your storefront offer a filter by brand ("show me everything from Anker") and show the brand on each product.
Rules of thumb
- Assign one brand per product. The field accepts several, because it is a multi-select (up to 50 brands per product; more is refused), but multiple brands on one product muddy your brand filters and brand reports, so pick the one that owns the product.
- If your store sells only your own products, set a single house brand or leave the field blank.
- Brands are flat (no hierarchy). Unlike categories, there is no parent/child relationship: a brand is just a name, slug, logo, and description.
The brands list
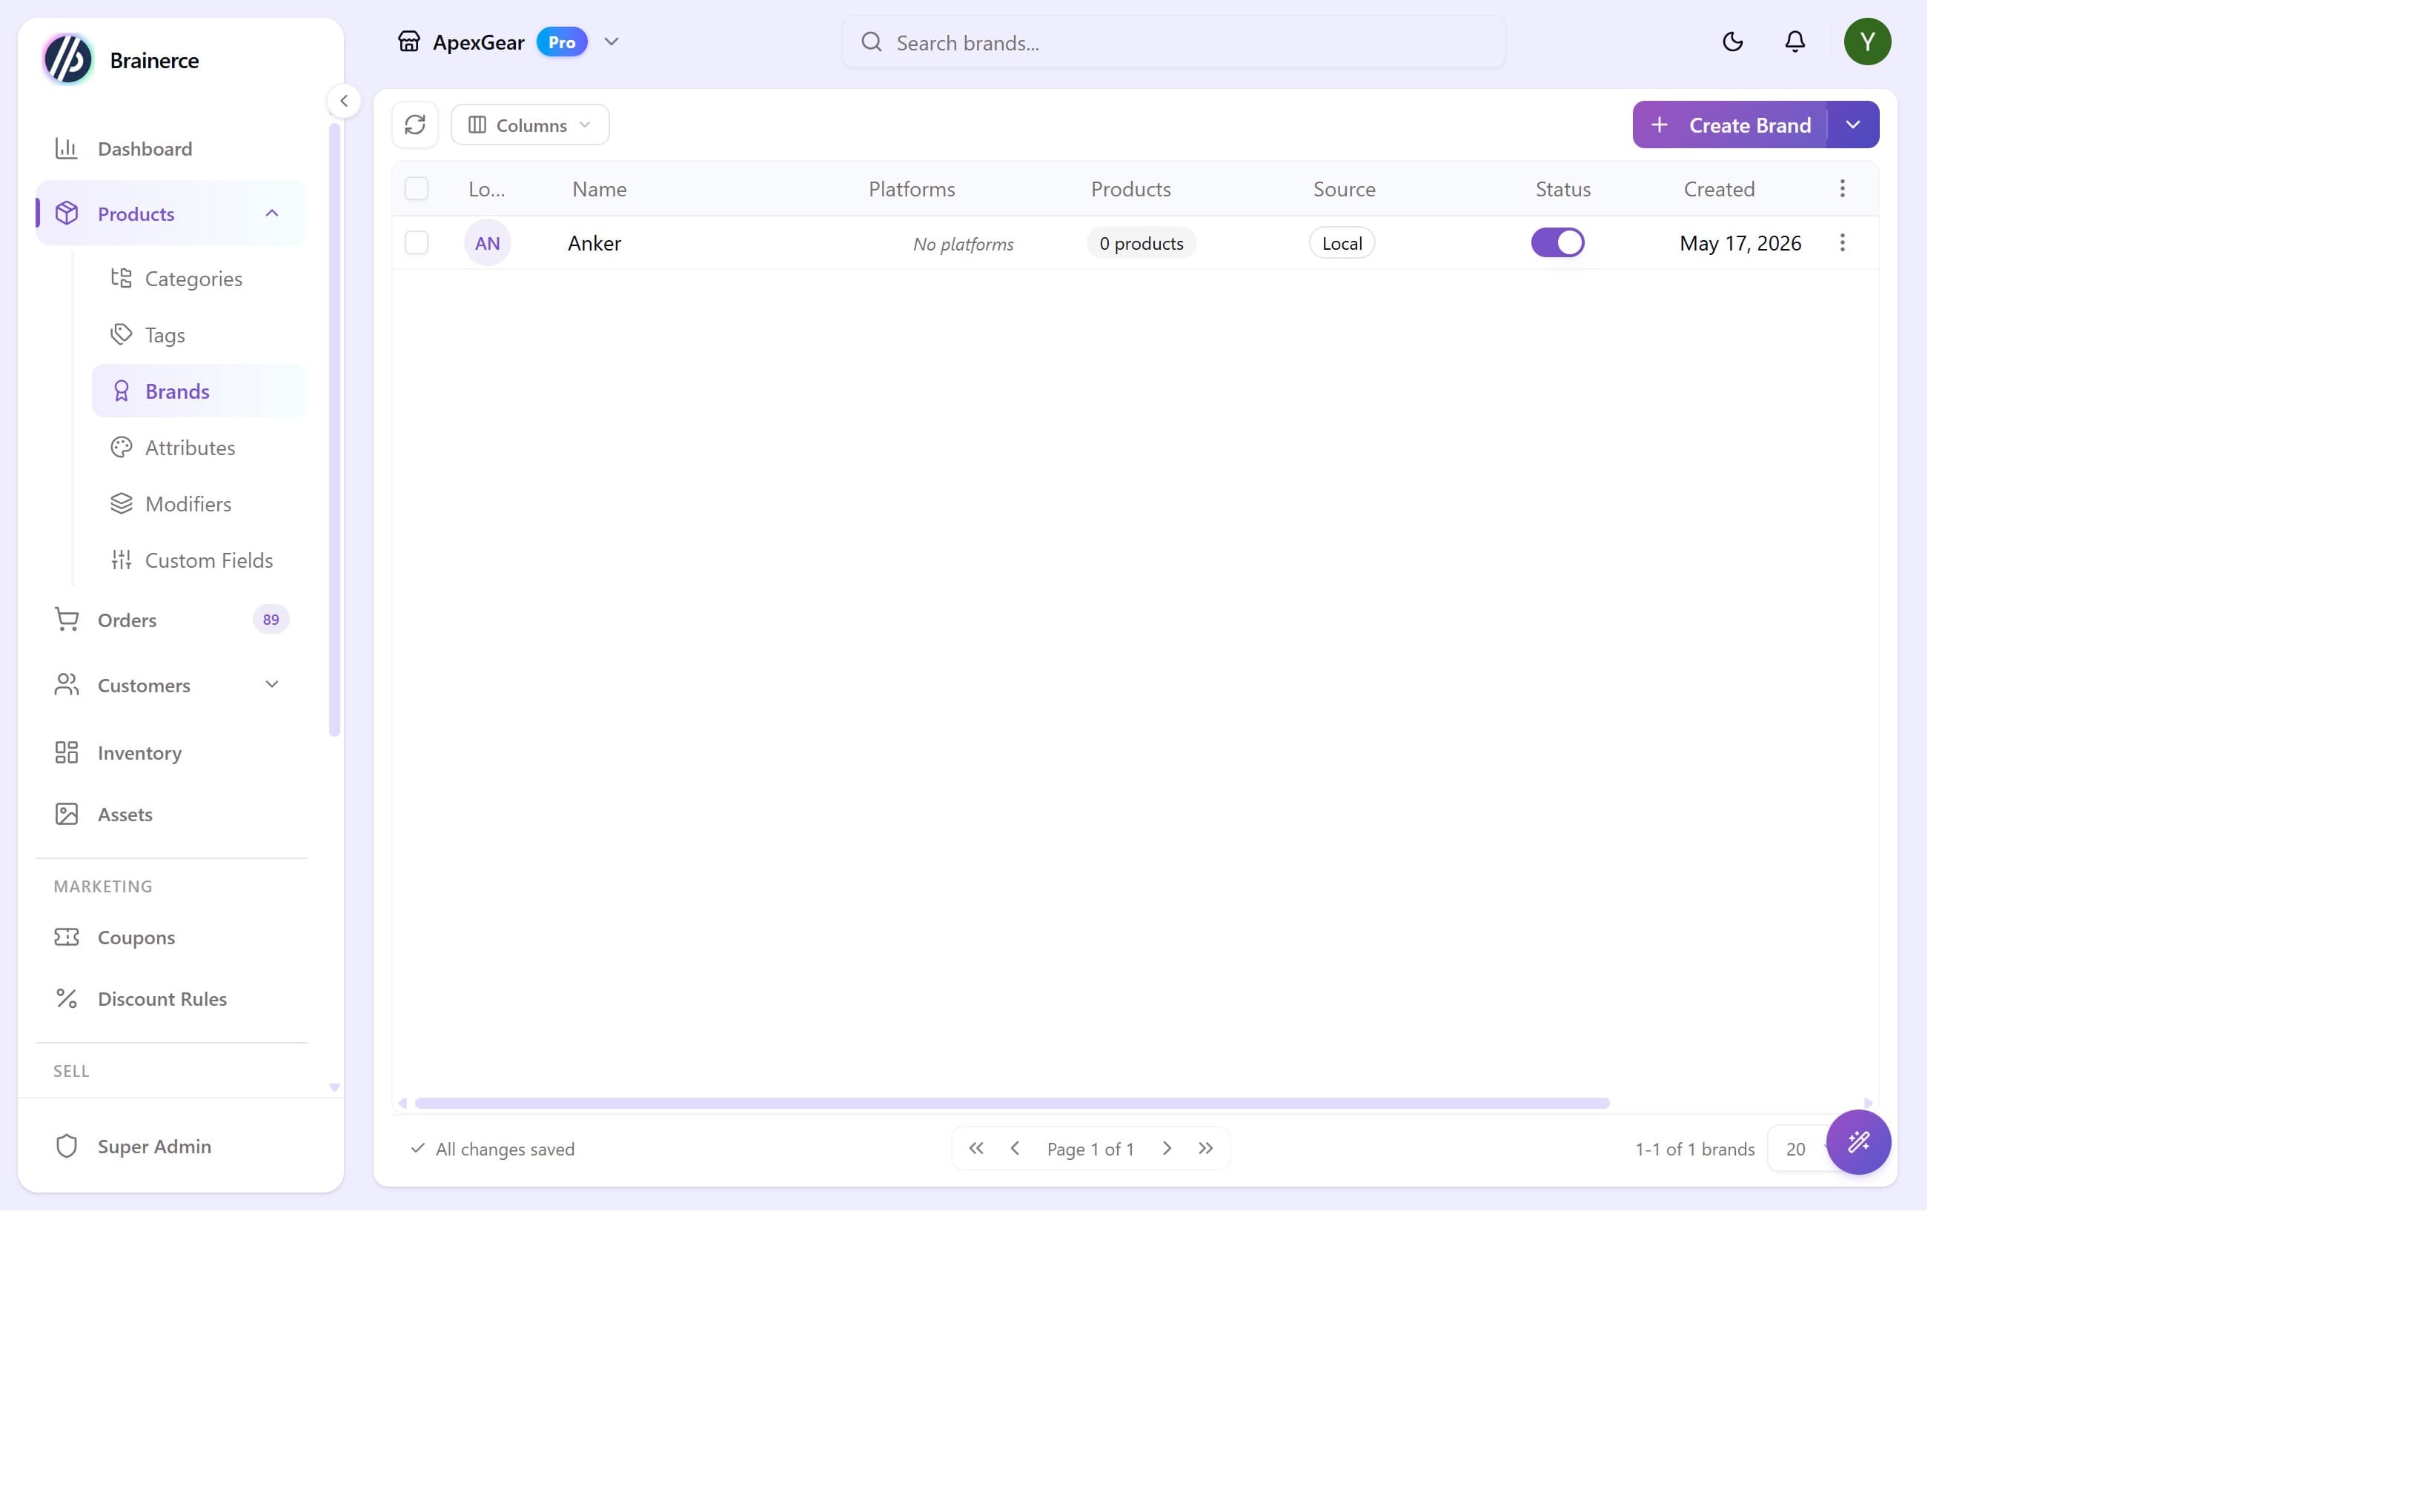
Go to Products → Brands to see all brands. The columns are Logo, Name, Platforms (the sales channels each brand is published to), Products (how many products use it), Source, Status, Created and Updated. Source says where the brand came from, and is Local for a brand you created here. Choose which columns show with the Columns button.
In the list, click a cell to edit it in place (Name and Status). The Products column is a read-only count, so assign products to a brand from the product itself, in the Brand field. The split arrow beside Create Brand offers Add via form or Add empty row, the row menu has Edit in Form, and the refresh button reloads the list. On a store with more than one language, Translate in the selection bar translates the selected brands.
Tick rows and delete them, then confirm. The brand is removed from every product that had it, and the products are kept with no brand. It cannot be undone. To stop offering a brand without losing it, switch Status off.
Don't see it in the sidebar? Brands is a module, and it can be switched off for a store; some store types start with it off. Turn it back on under Settings → Modules.
Creating a brand
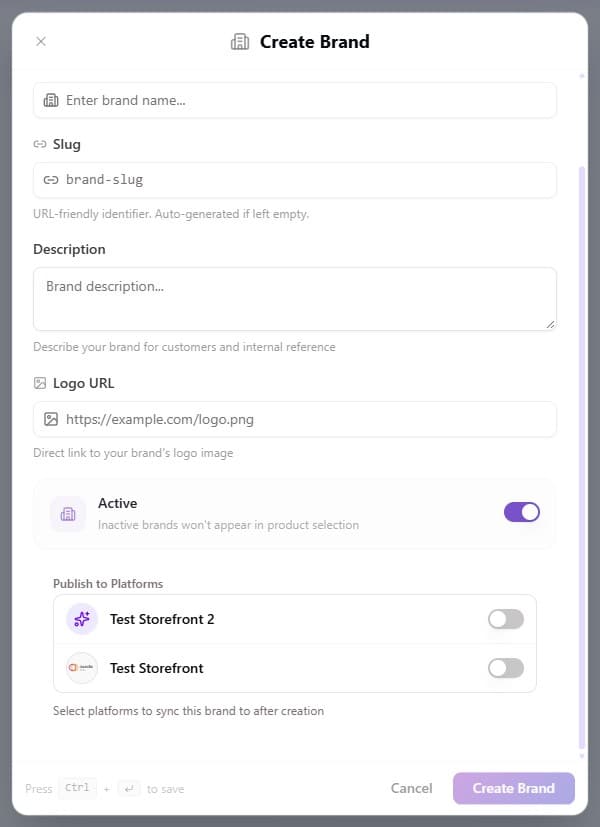
Click Create Brand. The dialog has these fields:
| Field | What it does |
|---|---|
| Brand Name | Required. Shown to customers on product pages and brand filters. |
| Slug | URL-friendly identifier auto-generated from the name (anker). You can edit it before saving, and it can be changed at any time. Renaming a brand does NOT change its slug, so the brand URL stays the same; change the slug field yourself if you want the URL to follow the new name (a changed brand slug leaves no redirect behind, so the old address stops working). |
| Description | Optional. Returned to your storefront with the brand, which can use it as a brand page's meta description and header text. |
| Logo URL | A direct web address (a valid URL) of the brand logo image (not a file upload; host the image on your CDN or any public URL). Returned to your storefront with the brand, which can show it in a brand page header or next to a brand filter. |
| Active | Toggle OFF to hide the brand without deleting it. Inactive brands don't appear in the product editor dropdown. |
| Publish to Platforms | Syncs the brand to the sales channels you pick. Toggle on per channel. Shopify and WooCommerce are not channels you can publish to. |
Click Create Brand and the brand immediately appears in the Brand dropdown when editing any product.
Brand pages on your storefront
Brainerce does not create a page for a brand. It stores the brand's name, slug, logo and description and returns them (with each product's brands) to your storefront. Whether a brand gets its own page, for example /brands/anker listing its products, is up to how your storefront was built. The starter storefront has no brand page: it offers a brand filter on the product list. Ask your developer or an AI builder to add a brand page if you want one, using the brand slug and the product list filtered by brand.
Where the brand shows up on orders: the brand chip on an order line
When an order is placed, each line keeps the product's brands as they were at that moment. In the dashboard, the Order Summary window and the Order Details window (opened from the Items column of the Orders list) show one chip per brand under the SKU of the line. Because a product can carry several brands, a line can show several chips.
- A product with no brand gives a line with no chip.
- It is a snapshot. Renaming a brand, or deleting it, later does not change an order that already exists. The chip keeps the name the brand had at the sale.
- Old orders and imported orders have no chip. Orders placed before this was added, and orders imported with the Migration Tool from WooCommerce or Shopify, carry no brand. Brainerce does not fill them in afterwards, even if the product has a brand today.
- A deleted brand is not copied onto a new order. A brand that is only switched off (Status off) still is.
- Hand-made orders, orders created through the API or the admin MCP tools, and products added with Edit items take the brands from your catalog at that moment.
- It is shown only in those two order windows. It is not on the printed order sheet, not in order emails, not in a column of the Orders list and not in an export.
- Your developer gets it too. The brands of each order line are also in the order API responses, the SDK (
OrderItem.brands) and the order webhooks, when the line has any.
See Order details. Brand chips on orders have nothing to do with brand pages: Brainerce still does not create a page for a brand.
What's next?
- Categories & tags show how to organize your catalog hierarchy.
- Attributes cover Size, Color, Material and other variant-generating properties.
- Add a product to assign a brand during product creation in the Organization panel.
SEO Autopilot
Find and fix the SEO problems costing your store search traffic, across your whole catalog, instead of auditing products one at a time.
Kits (sell several products as one)
Create a kit that sells several of your products together as a single item, with a price and a sale price you set like any other product, and stock always worked out from the contents.